
It was my niece and nephew’s birthday party Saturday afternoon, and here it was late Friday morning. I hadn’t purchased a gift for either one, nor did I want to pack my 5 kids in the van to run to the store to buy them.
Fortunately, I have a sewing machine, several large tubs of scrap fabric, and an ever-living desire to make things. So, I sat down at my machine and soon had an adorable striped blue and white bowtie to gift my nephew and a pink velvet bow and floral scrunchie for my niece.
Gifts done, BOOM!
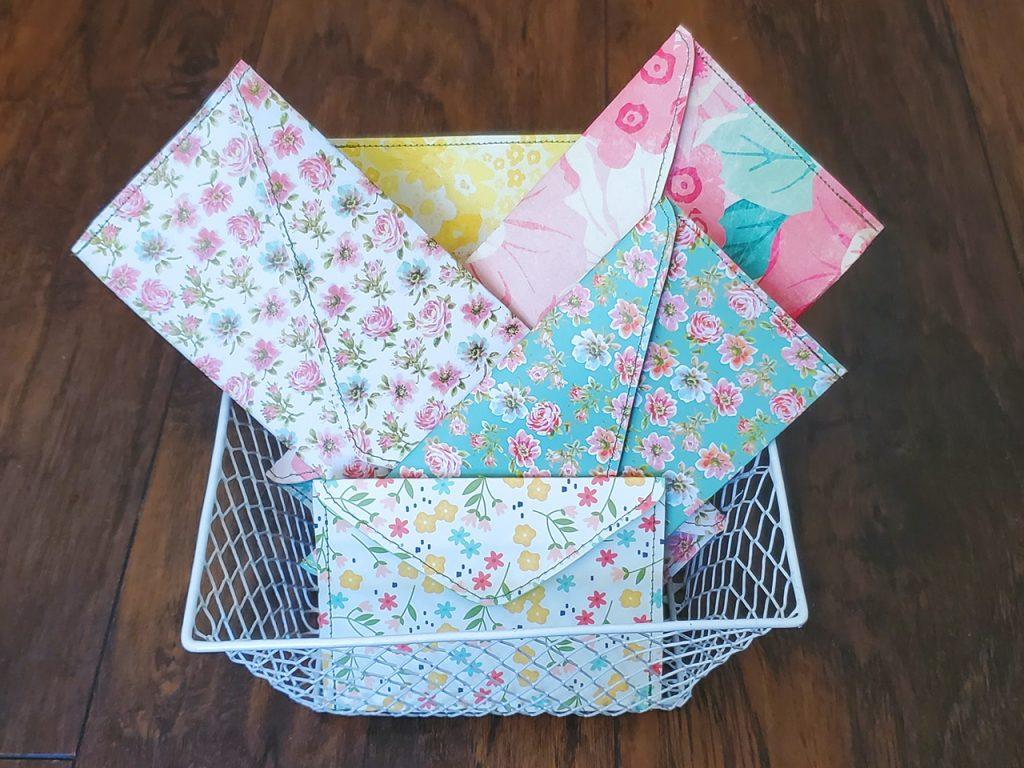
But I wondered what to wrap them in. They were a bit too small for a gift bag or wrapping paper, and a white paper envelope sounded dull. I looked at my large stash of scrapbook paper and had the greatest idea; I could SEW an envelope!
I quickly sewed 2 paper envelopes and they were the perfect way to complete each gift. I really love how the envelopes turned out and HAD to share this project with you.
Read along to find out how to make your own sewn envelope. You can make many sizes of these envelopes, and use whatever scrapbooking or other paper you have on hand. What a fun project this turned out to be!
For this project you will need:
- Envelope flap templates
- Ruler
- Cutting mat (optional)
- Scissors
- Glue stick
- 1 or 2 sheets of scrapbook or craft paper
- Sewing machine or needle and thread
- Velcro dots
1. Choose your envelope length and paper
Print and cut out these envelope flap templates. Once they are cut out you can store them in one of your sewn envelopes to keep them all together.
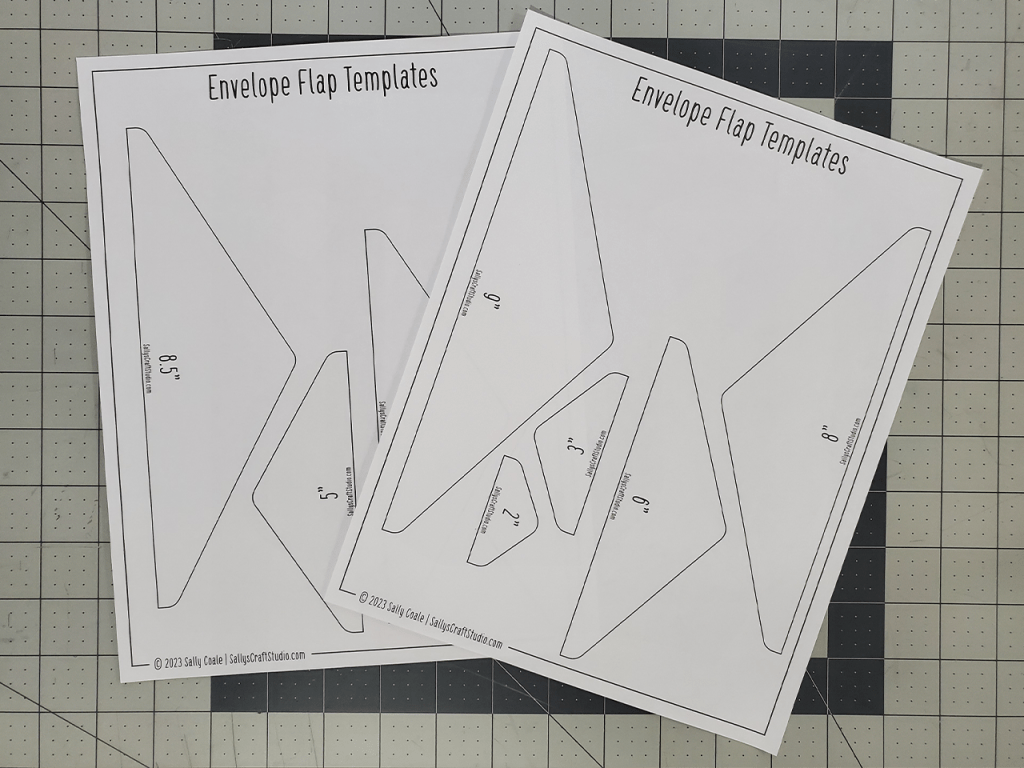
Decide on the length of your envelope. If you are making it for something specific, measure what you want to put in the envelope. Choose the envelope flap template with the length that will fit your object and have some wiggle room.
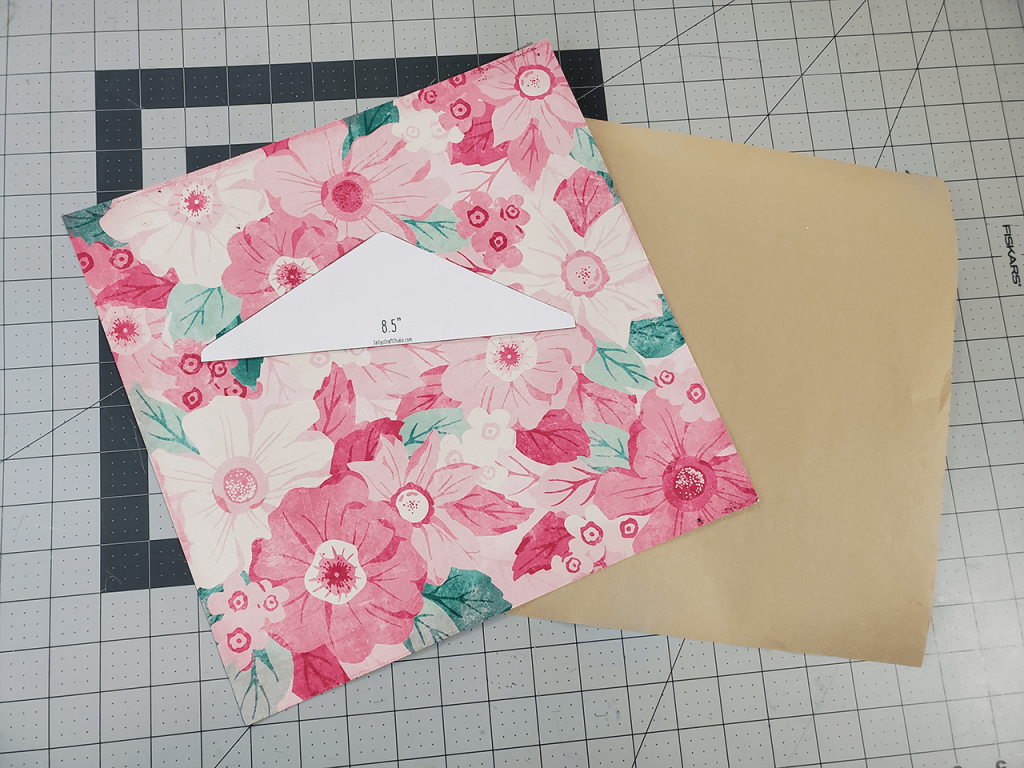
Choose a scrapbook paper with a design you love and a complimentary paper for the inside of the envelope. I like the look of brown craft paper on the inside of my envelopes. You can use just 1 sheet for your envelope, but a second sheet of paper adds strength to the envelope as well as interest to the design.
2. Decide the height and depth of the envelope
Decide the height and depth of your envelope. You can add depth to the envelope by creating a gusset with a “W” shaped fold at the bottom. We will talk more about this in a few steps.
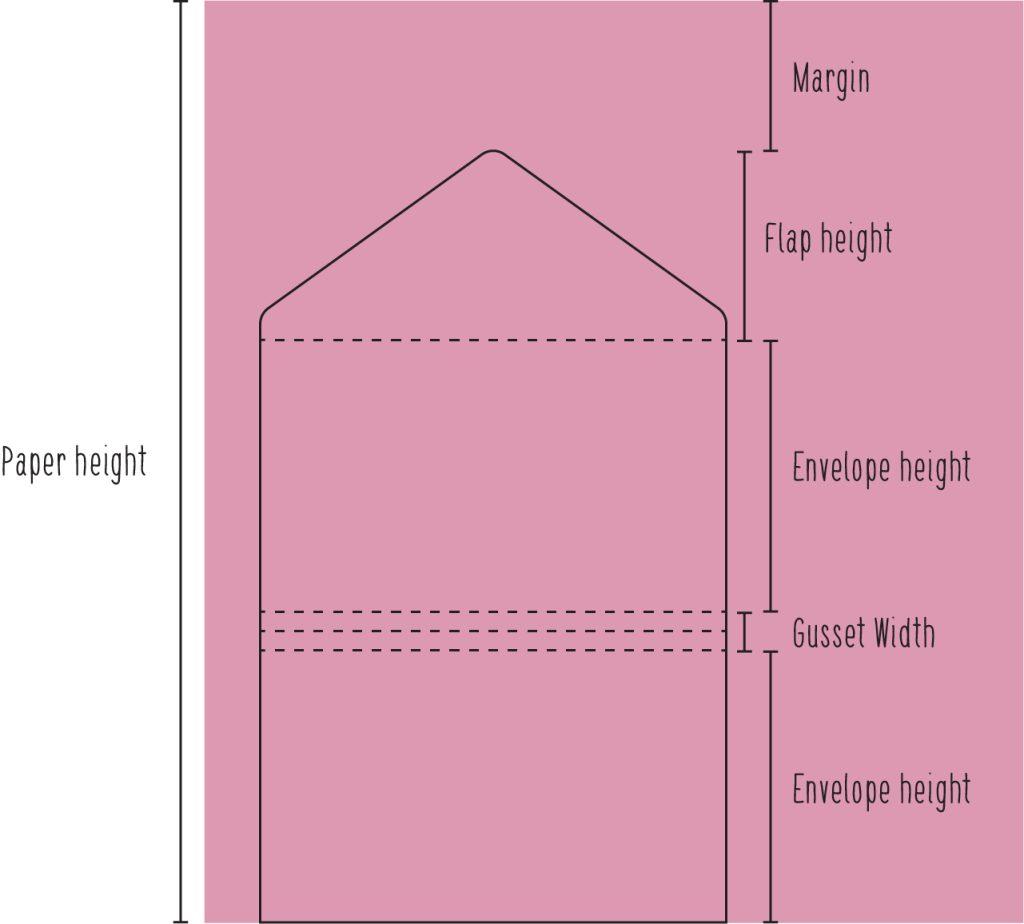
The height of the paper you use for your envelope should be at LEAST:
Height of envelope + depth of gusset + height of envelope + height of flap + margin (at least 1/4″)
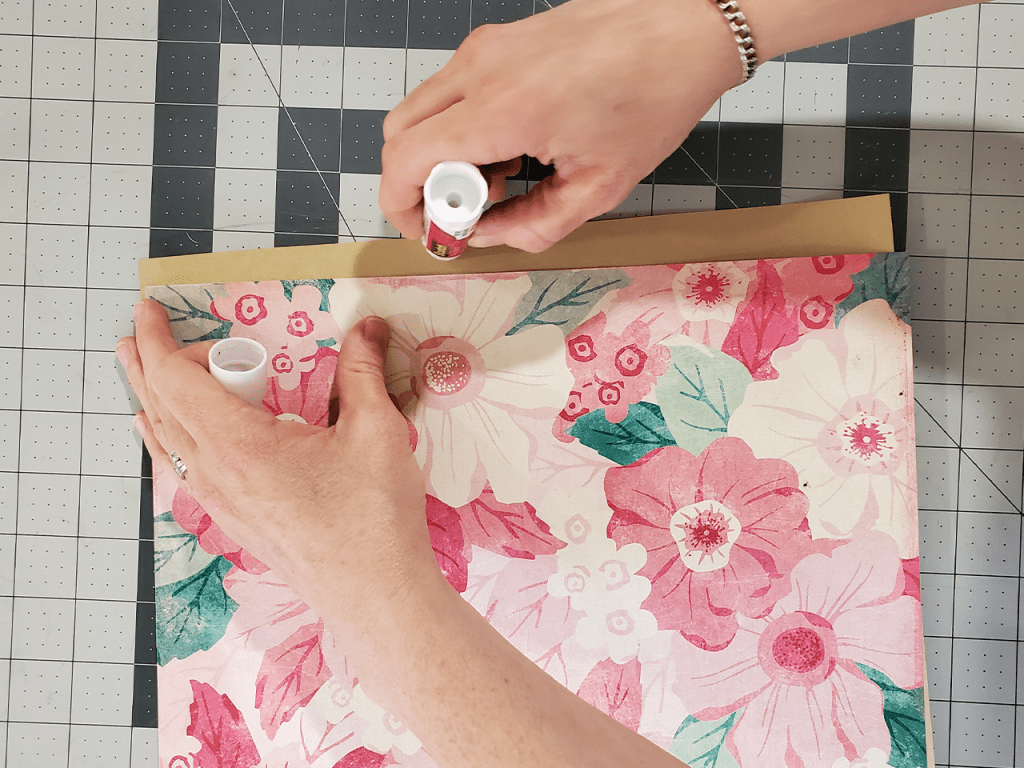
3. Glue the papers together along the top and sides
Place a small strip of glue along the top and side edges of the WRONG side (side without a design) of the paper you chose as the envelope lining. You don’t have to glue the bottom.
Carefully line up the WRONG side of the outer envelope paper over the glued lining paper. Press them together firmly along the top and sides. The top edge is the most important to line up neatly as this will be the opening of the envelope.
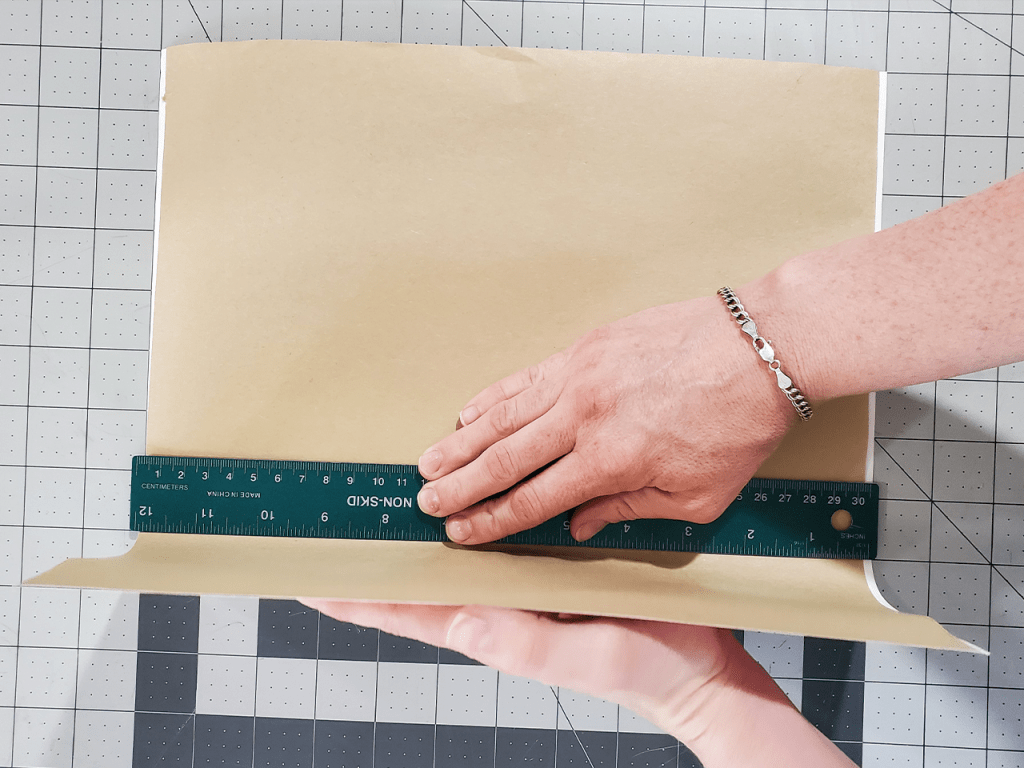
4. Fold the envelope
From the top glued edge of your paper measure the envelope height and mark where the fold should be. Lay a ruler across the paper at the markings, fold the paper, and crease the fold.
If you don’t want to add depth by folding a gusset, you may skip to the next step.
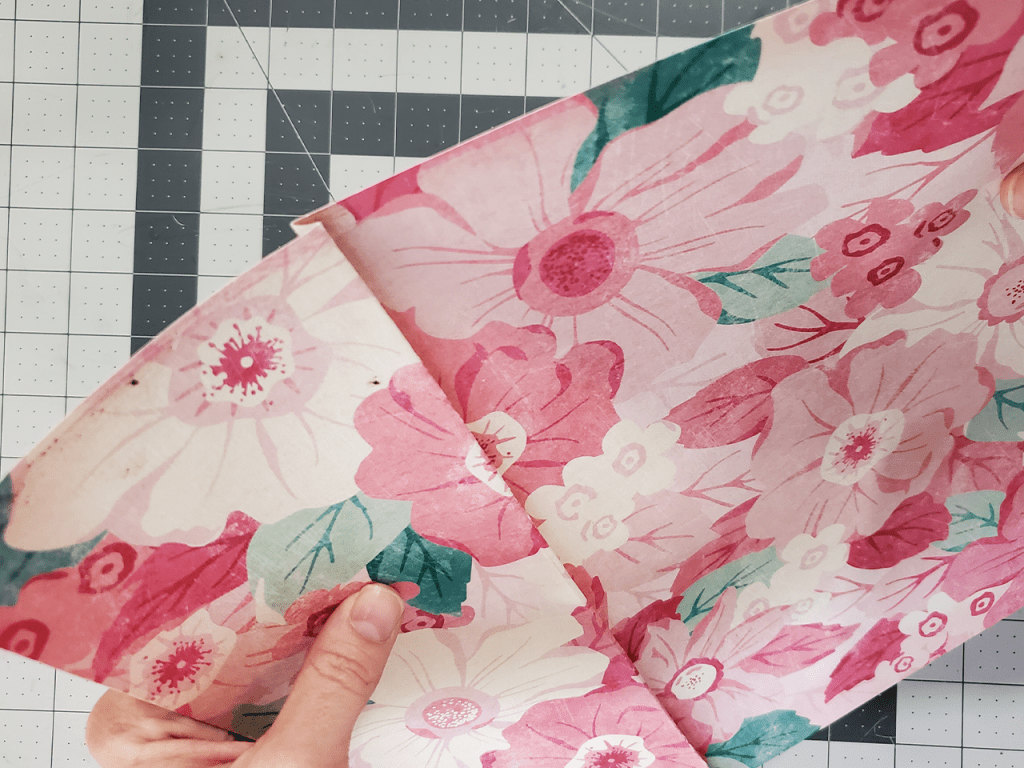
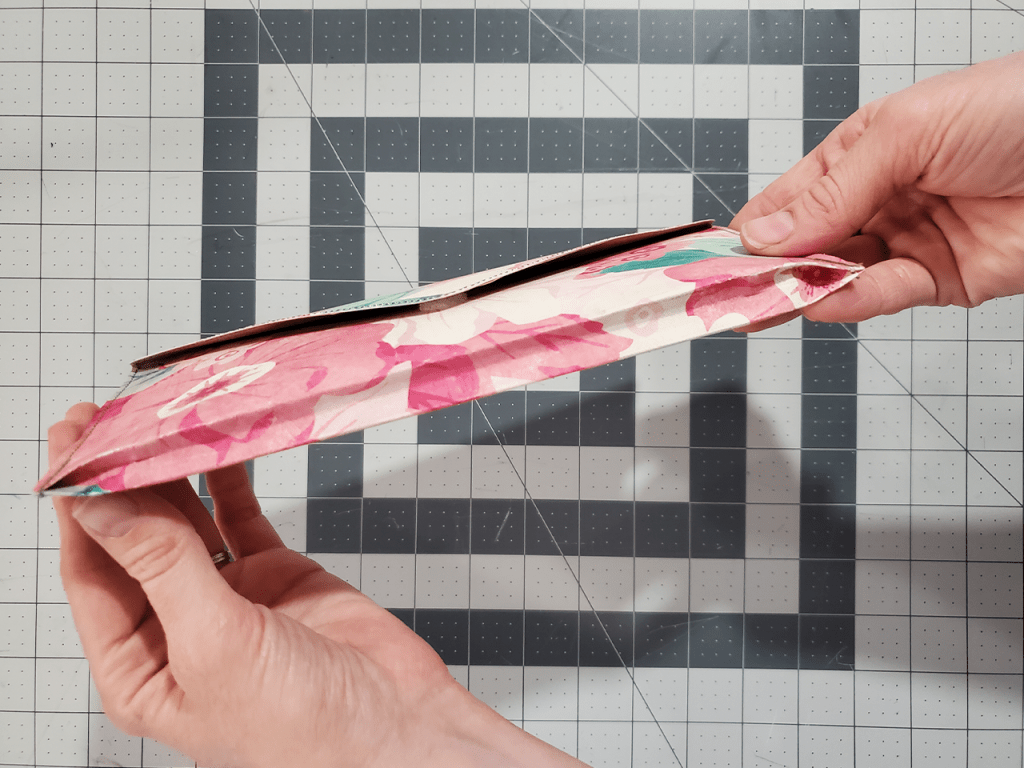
Here is where we add the “W” fold and make a gusset to give depth to the envelope. I’ve found that 1/2″ and 1″ are good gusset sizes.
Flip your paper over so the shorter part of the folded paper is facing down. From the edge you just folded, measure and mark half of your desired gusset depth. Use your ruler as a flat edge across your markings and fold the paper back the other way, and crease. Your folds should look like the image below.
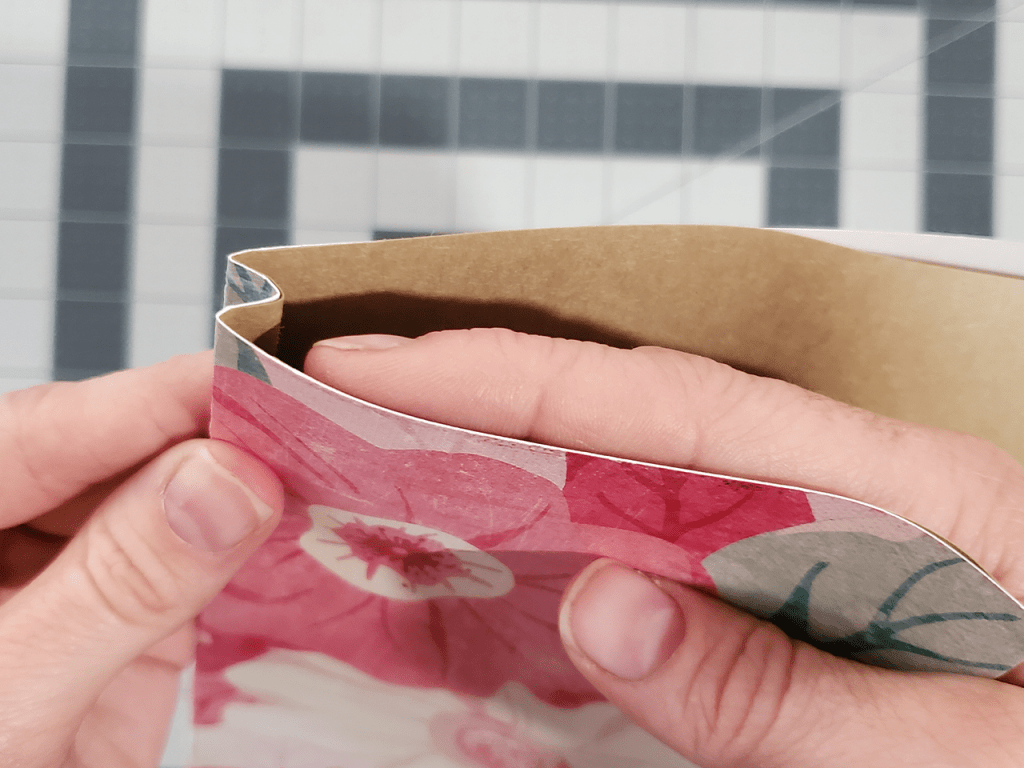
From the new edge you just folded, once again measure and mark half of your desired gusset depth. Use your ruler as a straight edge to fold the paper back the other way again matching this fold up to the first fold. Crease your folds. Your envelope should now look like this with a “W” fold forming the gusset at the bottom of the envelope.
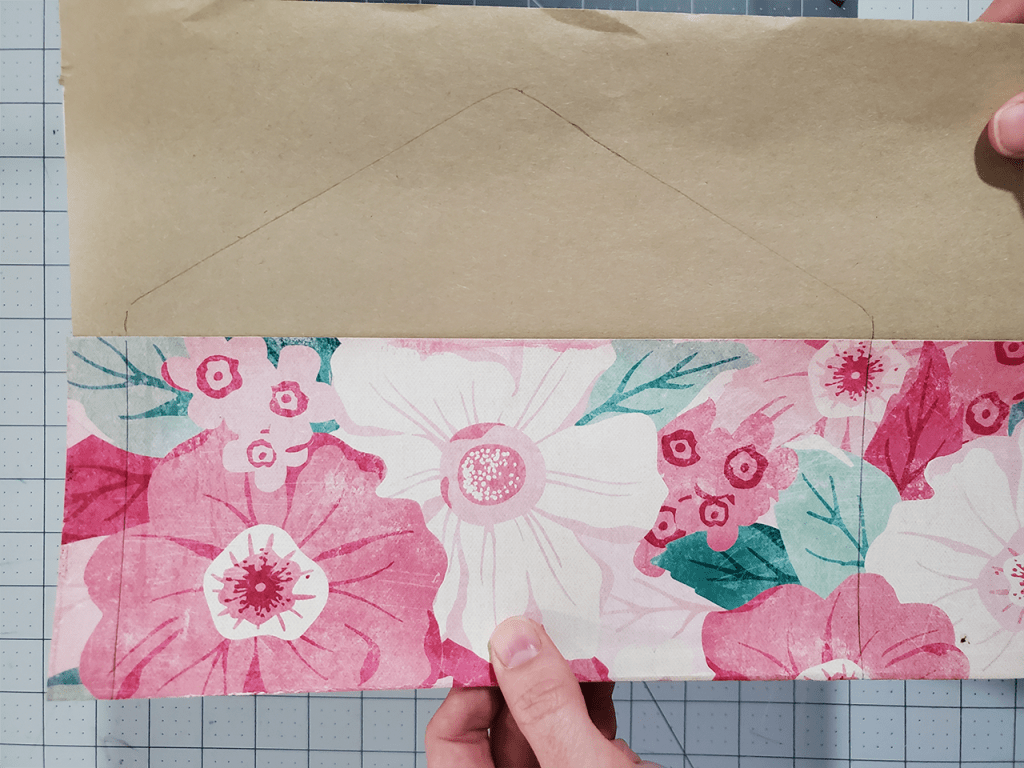
5. Trace the stitch lines
Line up the envelope flap template along the top (glued edge) of the envelope and trace around the top of the flap with a pencil. Mark lightly so the marks are easily erased.
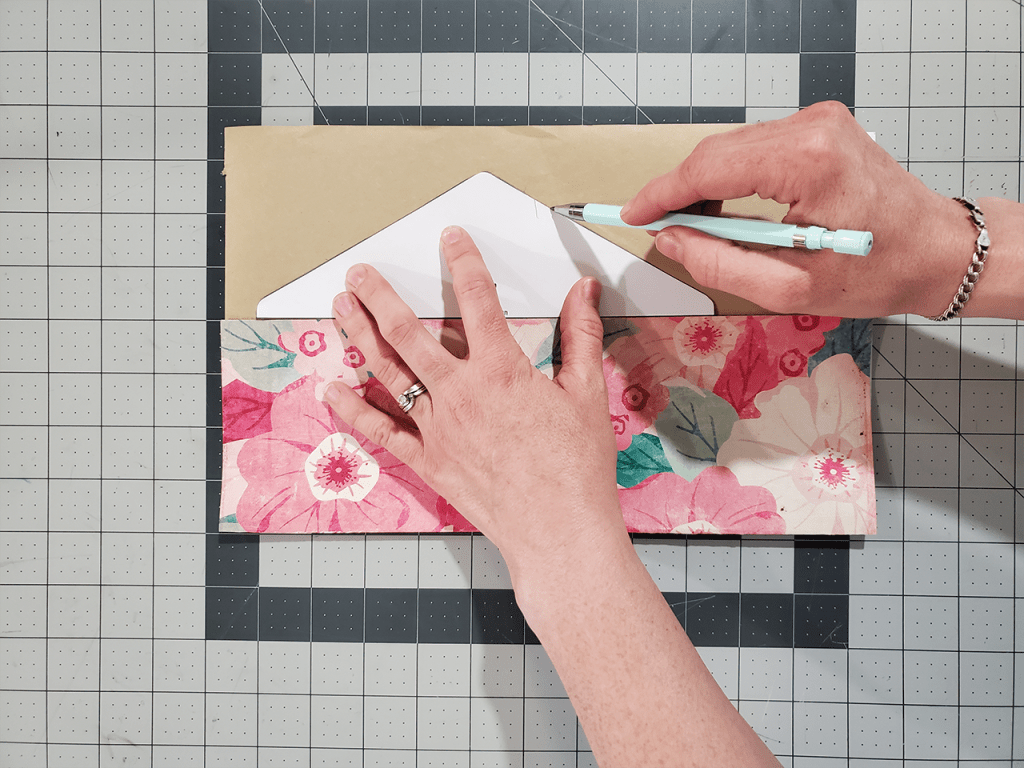
Use a ruler to trace a straight line down from the outer edges of the flap template to the bottom of the envelope.

6. Sew the envelope
Bring your envelope to your sewing machine and sew along the traced pencil markings. Remember to backstitch at the beginning and the end so the thread doesn’t come unraveled. Or you can sew by hand with a needle and thread.
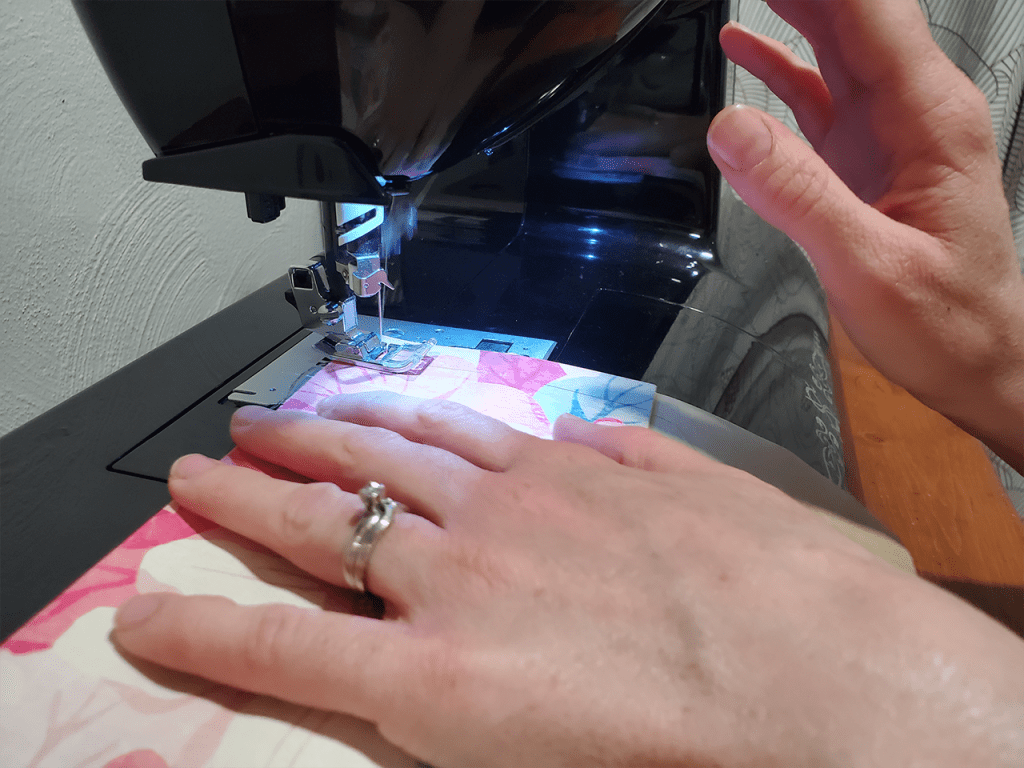
Go slowly around the corners so you can get smooth curves and stitches. I like to turn the wheel by hand and turn the paper at the same time as I go around the corners so I have more control. You may opt to sew sharp corners instead of rounded ones.

7. Trim the thread tails
Put a little glue on the thread tails to hold them down along the stitch line before trimming them. This is one more way to prevent them from coming unraveled. Then trim the thread tails.

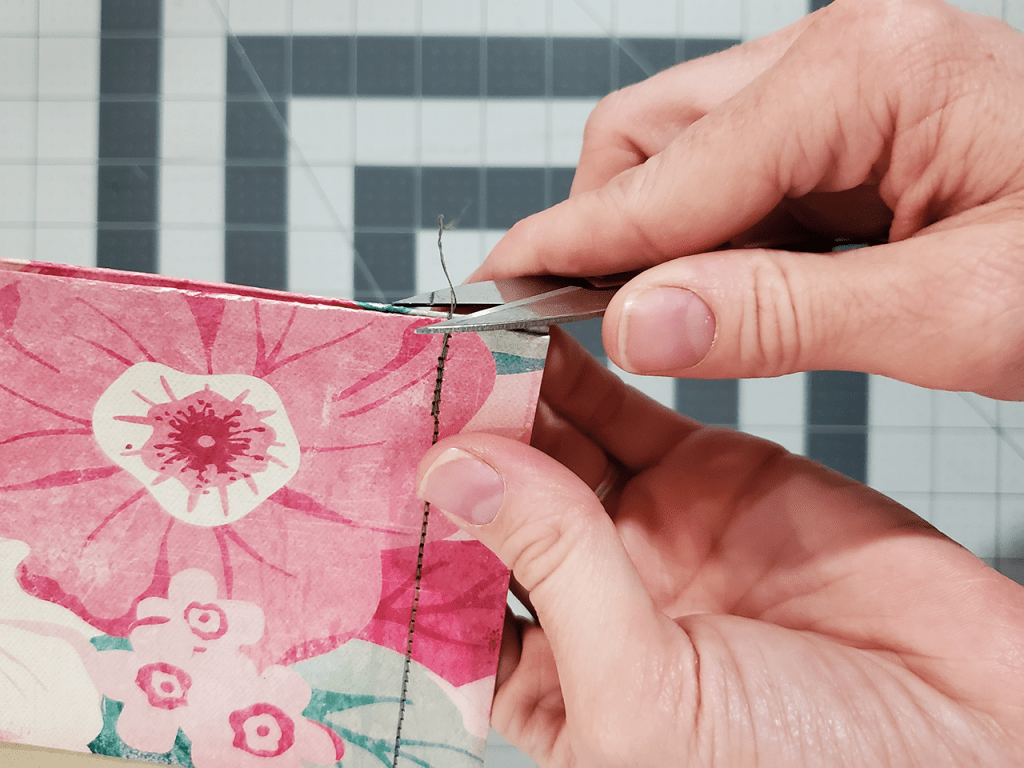
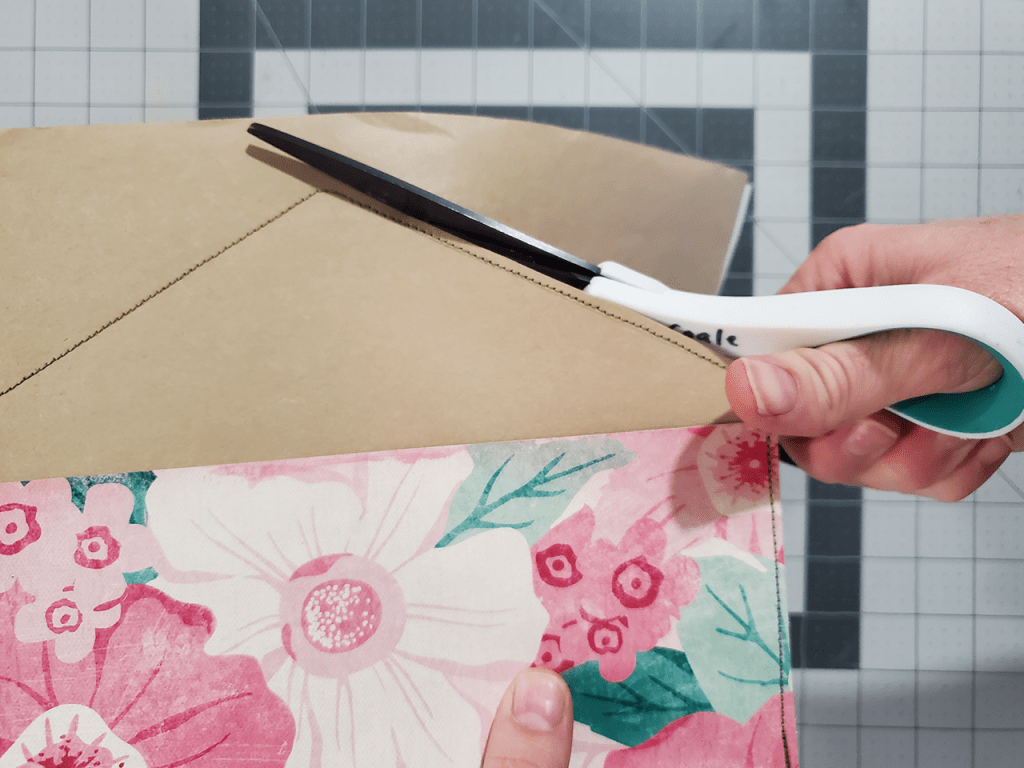
8. Trim away the excess paper
Trim the excess paper from around your stitched envelope seam. I like to leave about 1/8″, but you can trim as you like.
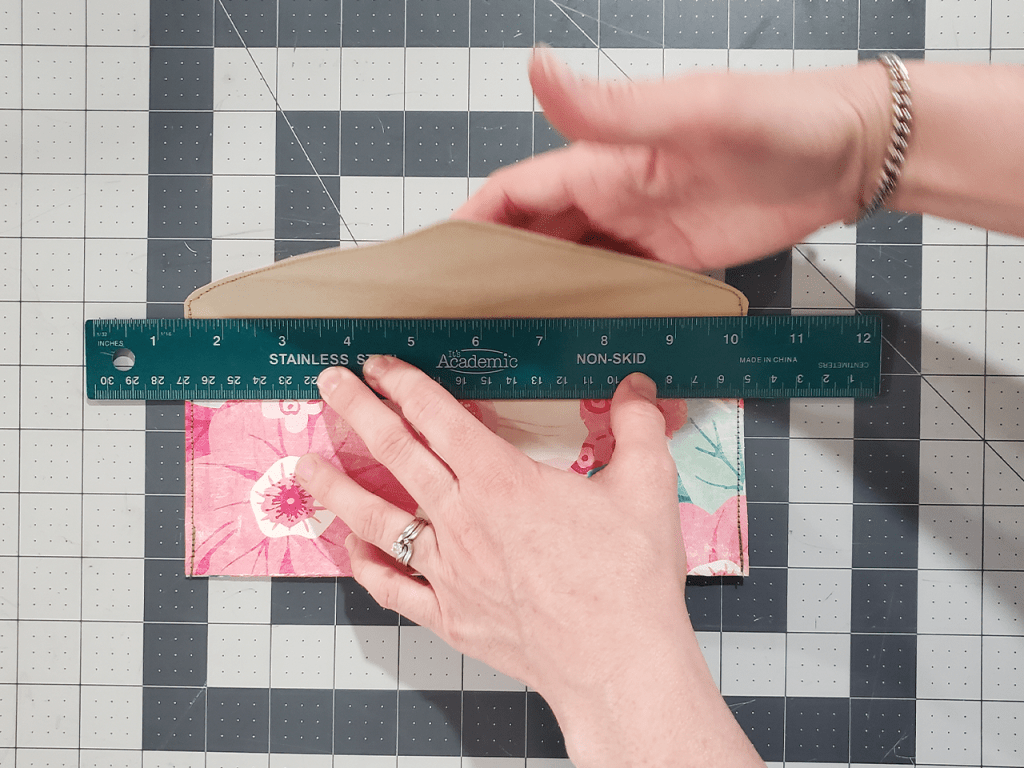
9. Fold down the envelope flap
Use a ruler along the top of the envelope opening to fold down the envelope flap. Crease for a crisp fold.
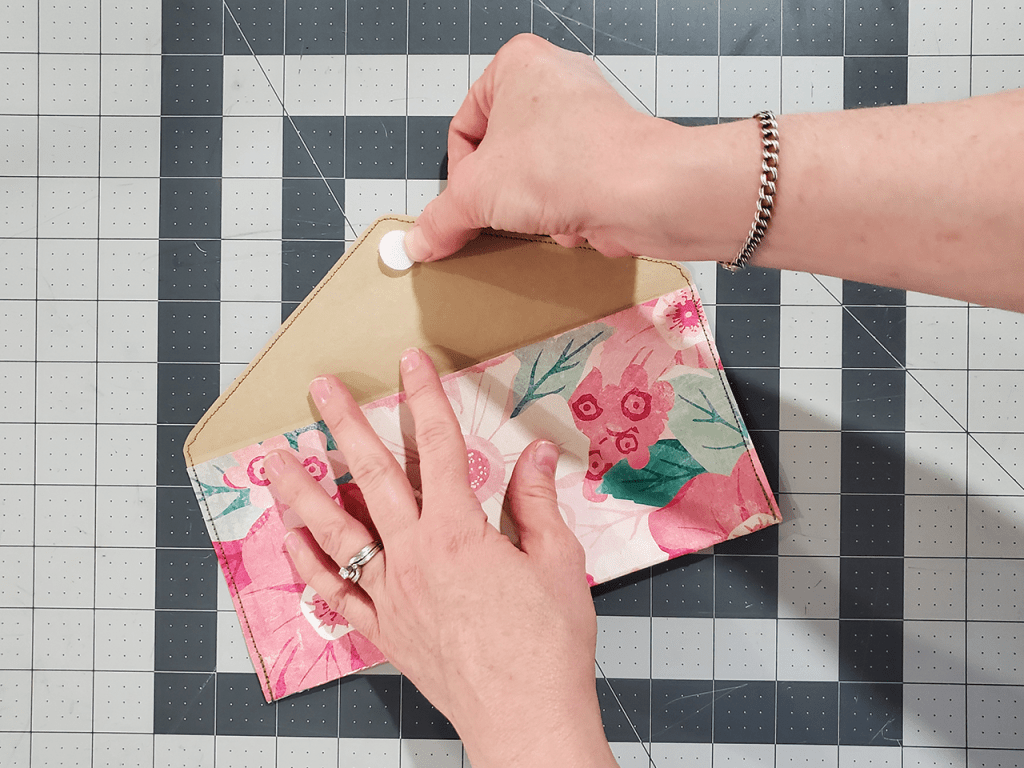
10. Add a closure
Add a velcro dot to make the envelope resealable. Stick the hook and loop parts of the velcro together and attach the sticky side of the hook dot to the top curved portion of the envelope. Press the envelope flap down so the sticky side of the loop dot finds its place on the envelope for a nice close.
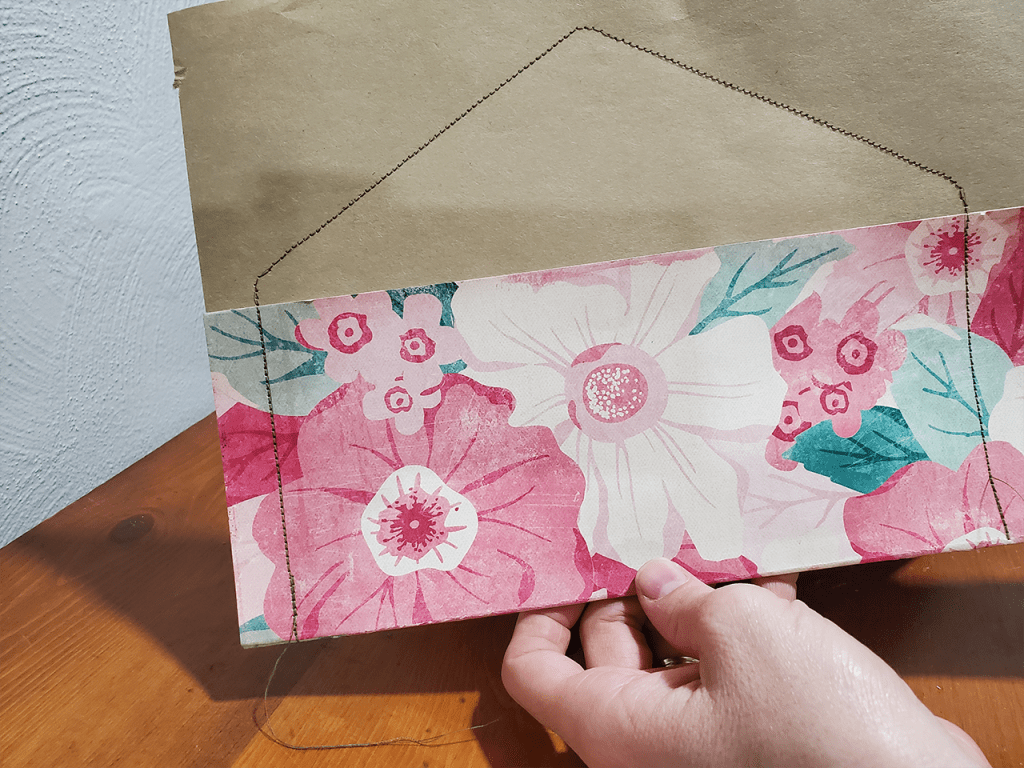
11. Admire your work!
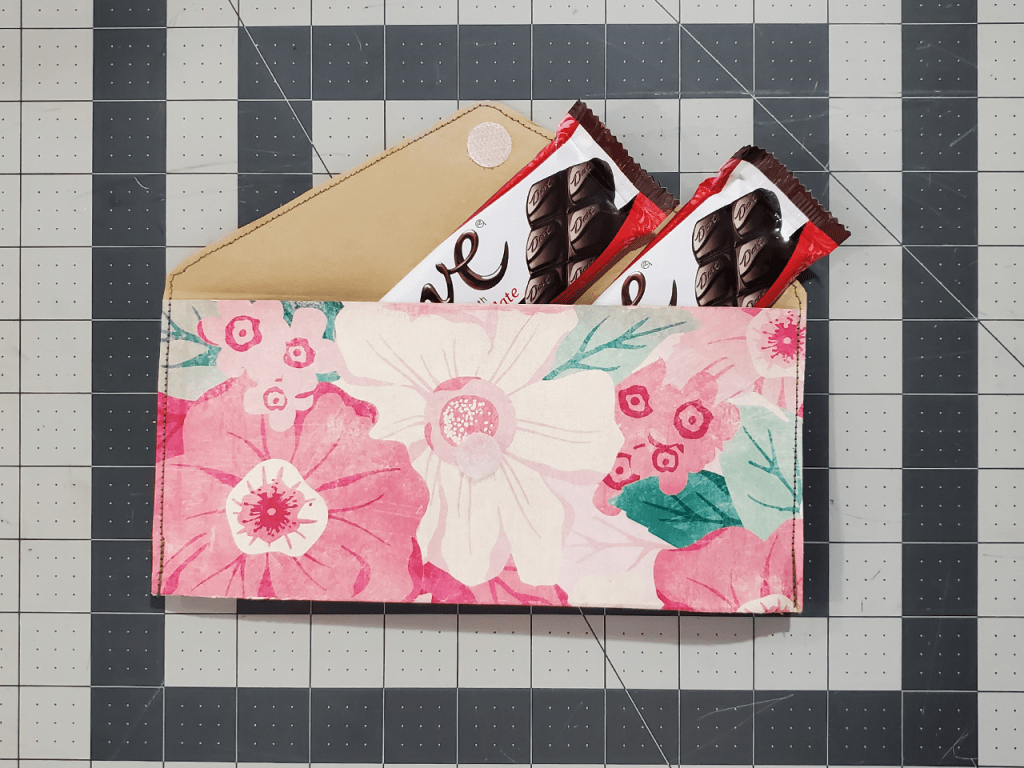
Your envelope is done! Look at it, in all its beauty. The gusset on the bottom makes it perfect for those small gifts that you just don’t want to wrap. Place the gift in there with a sweet little card and bring your gift up to a whole new level!
I really hope you like this craft tutorial and found the envelope flap templates helpful to complete this project. Please leave me a comment if you decide to make this, and share this post with someone else you know will love this craft.
Thanks for stopping by!
That’s a cool idea for wrapping a small gift!
Thanks Susan!